Command Post Home Page : F2
|
|
F2: Command Post Editor Functions
The Hex Editor menu item allows you to control the editor in a variety of
ways. Many options are available to help you debug your applications and related
variables.
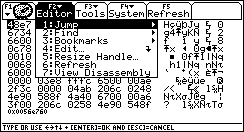
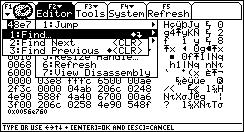
Jump
The Jump submenu allows you to jump to and view many different important locations
in the calculator's memory.
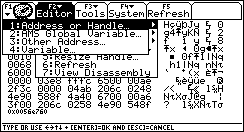
Jump: 1: Address or Handle
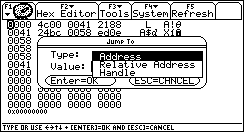
The Jump To Dialog displayed by this option allows you to jump to any unsigned
long absolute address, an offset from the current address (relative address),
or handle on your calculator.
- The Address type will immediately jump to the address you specify.
- The Relative Address type will add the offset you specify to the current
address pointed to by the cursor
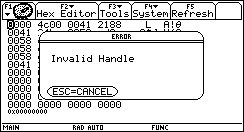
- The Handle type will dereference the handle you give it, and move the
cursor location to the beginning of the handle. If the handle does not exist,
an Invalid Handle Error will be thrown.
Jump: 2: AMS Global Variable
The Jump To dialog displayed by this option allows you to directly access
and/or monitor a wide variety of AMS global variables. After selecting the
AMS global variable, and any relevant information, you will be taken to the requested
memory location. The DIAMOND UP key combination will take you to the beginning
of the variable, and the DIAMOND DOWN key combination will take you
to the end of the variable if Command Post is able to determine the length of the
variable.
There are several cases that need special attention:
- MO_option
- This variable is initialized with a call to MO_currentOptions(); before
you are taken to the memory location of the variable
- Any changes made to this variable will not be applied to the AMS because
Command Post will not call MO_digestOptions(); for you. If you wish to change
mode settings, do it like everyone else, and press the nice button that says
MODE! ;)
- OO_firstACB
- OO_firstACB will be dereferenced so that it points to the ACB rather than
the AppID if you say yes in the dialog that will popup after you press ENTER
to dismiss the jump dialog.
- If you say NO after pressing ENTER to dismiss the jump dialog, then you
will be taken to the location in memory where the value of the handle is
stored.
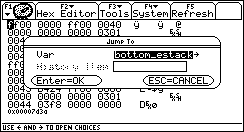
- HS_getAns
- HS_getEntry
- These are not true AMS global variables, but they can be very useful to
developers who are writing software that works with the Home Screen Application.
- The History Item text box will become active, and you are required
to enter a valid history item. If the requested item is not found, you will
be notified with an error dialog.
TIP: You can use this dialog to jump to the EV_errorCode global
variable. Next, bring up the Edit dialog
box, and choose WORD, change the mask to NONE, and type a number into the New
Value box. When you press enter, the AMS will throw the error number
you chose! This is a great way to find out what different error numbers mean.
Jump: 3: Other Addresses
The other addresses dialog allows you to jump to addresses that do not
fit well under the Jump To AMS Global Variables dialog.
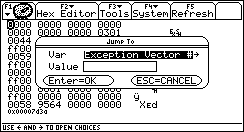
Description of the Options:
- Exception Vector (valid range 0 - 255)
- The 68000 processor used by the TI-89 / TI-92p / V200 keeps a #1024 byte
vector table beginning at $000000. This table contains pointers to routines
used by the CPU, operating system, and the user. The vectors are referred
to with an index from #0 through #255. Each vector is 4 bytes in length.
Due to the stack overflow protection mechanism which does not activate until
an address below 0x120 is written to, the vector table is more accurately
described as containing vectors from #0 - #71 inclusive for our purposes.
- You will be asked if you want to dereference the pointer. If you choose
no, you will be taken to the address of the pointer in the exception vector
table (somewhere between 0x0 and 0x400). If you choose yes, the pointer in
the exception vector table will be dereferenced, and you will be taken to
the location that is pointed to in memory (the actual code or data that is
pointed to).
- Auto Interrupt (valid range 1 - 7)
- This is a shortcut... Auto Interrupts 1 - 7 can also be referenced by Exception
Vectors 25-31 (addresses 0x64 through 0x7C + 4)
- Trap (valid range: 0- 15)
- This is a shortcut... Trap
#0 - #15 can also be referenced by Exception Vectors 32-47 (addresses 0x80
through 0xBC + 4)
- LCD_MEM
- This jumps to the address from which the LCD state is derived. This area
in memory is 3840 bytes in size.
- OS Contrast
- This jumps to the one byte variable that contains the current contrast
for the calculator. On HW2 calculators, this variable will range from 0 to
30, and on HW1 calculators, it will be 1/2 that (0 - 15). If you modify this
value, the change will not be noticeable until you turn the calculator off,
and then
back on, or you adjust the contrast.
- HW1/HW2 Memory Mapped I/O
- HW2 Memory Mapped I/O
- This is a range in memory that is often referred to as the ports. These
addresses which are mapped in memory allow you to communicate directly with
the calculator's hardware.
- KeyBuffer
- This is the area in memory where the Key Queue is located. It is home to
(among other things) the infamous kernel kb_vars.
- Rom Call
- This option allows you to jump to any rom call in the table pointed to
at address 0xC8. This feature is especially helpful for those wishing to
engage
in rom call replacement projects.
- TIP: If you wish to modify the AMS rom calls,
simply allocate a buffer in high memory which can hold the AMS rom call
table, copy the table over, and then replace individual rom calls as desired
with
pointers
to your own code. Finally, update the 0xC8 pointer. This is particularly
useful for debugging programs (you could modify HeapAlloc to count how many
handles have been allocated and freed for example). Please note that
you will not be able to modify the behavior of the AMS because it does
not
use
the
rom call table. The only applications that will work with this idea are ASM
programs and FLASH Applications.
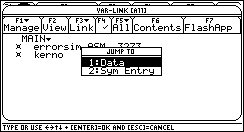
Jump: 4: Variable
Choosing this option is the same as bringing up the var-link screen with the 2nd
- VarLink combination. Choose a variable, and press ENTER. You will
be presented with a choice: Data or SymEntry. Selecting Data will
take you to the data that the variable holds; the DIAMOND + UP / DOWN key
combinations will be updated to reflect the beginning and end of the variable's
data respectively. Selecting Sym Entry will take you to the SYM_ENTRY structure
of the variable.
One possible use of this is to change the size of a variable's handle. By jumping
to the SYM_ENTRY structure, and then to the last WORD in the structure,
you can locate the handle that is associated with the variable.
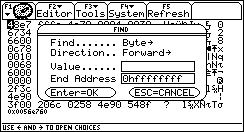
2: Find
The Find tool-set is a very powerful feature. It allows you to search Forewords and Backwards for Byte, Word, Long,
and String values. The search begins at the current cursor address,
and continues until a match is found, or address which you specify as End
Address is reached.
The ON key
may be used at any time to cancel a search. You may search Forewords and Backwards through
memory.
Note: When you are searching for values, sometimes, the find feature will
stop at an address, and the hex editor will not display the value that you were
searching for. This is because there are some locations in memory that are highly volatile -
they change frequently. The find feature found the value that you were looking
for, but the hex editor did not display it because it had changed in the short
amount of time that it takes to switch from Find Mode to the Hex Edit Mode.
Note: Because the find feature is not limited, if you search for a specific
string, it will be found at least once because Command Post keeps the string in
a buffer of its own - you may have found the buffer that Command Post uses!
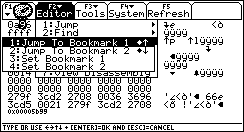
3: Bookmarks
The Bookmarks sub-menu give you access to Command Post's internal
bookmarks. Whenever you
jump to a variable with the var-link or the Jump menu item,
Command Post updates Bookmarks 1 and 2 so that they point to the beginning and
end of the data structure
being edited. You may manually set these bookmarks using the Set Bookmark functions.
Bookmark1 has a shortcut:  
Bookmark2 has a shortcut: 
NOTE: For best results when using bookmarks, please ensure that Bookmark1
points to a lower address than Bookmark2. |
 |
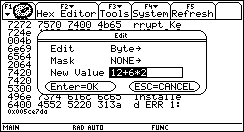
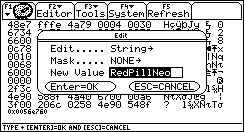
4: Edit
The Edit dialog is an integral and powerful feature of Command Post. It
combines the ability to edit Byte, Word, Long, and String values with the
expression evaluation power of the AMS, and the ability to apply bit masks such
as AND, OR, and XOR.
When editing numerical values (Byte, Word, Long), Command Post will
parse the input to produce a result, and then it will round the result (if necessary)
down to the nearest whole number (Example: 1.7 is rounded to 1). Expressions such
as 3+x are valid when x is defined! You can even use Command Post's peek and poke
TI-Basic extensions in this (and every other dialog in Command Post that accepts
numerical input) dialog.
 |
 |
| Pressing ENTER will place the value 0h18 (24) at the current
cursor location. Pressing ESC will cancel the operation. |
Pressing ENTER will place the ASCIIZ formatted string "RedPillNeo" at
the current cursor location. Pressing ESC will cancel the operation. |
TIP: In the hex editor, press the ENTER key to use the edit dialog.
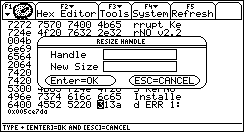
5: Resize Handle
The Resize Handle dialog is an especially powerful tool that requires extreme
caution with its use. Given any handle number, and size, it resizes the handle
so that it uses the amount of space requested. If an error condition is encountered,
you will be notified with an error dialog.
One of the primary uses of the Resize Handle feature is to make variables larger.
The last word in the SYM_ENTRY structure for a variable is its handle.
6: Refresh
Refresh (also available via F5) completely redraws
the hex editor display. The editor will redisplay each byte value on the screen.
This feature is useful when you are viewing a volatile memory area, and need the
current values, or are unsure if the memory that you are viewing has changed.
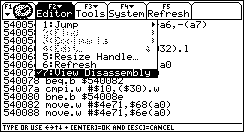
7: View Disassembly
The Disassembly View displays ASM equivalent of the data pointed to
by the Hex Editor cursor. For more information about the disassembler, please visit
the
Disassembler Special Topics page.
Note: The disassembly will be clipped when
the calculator is running in LEFT-RIGHT split screen mode. For best results,
always use
the
FULL or TOP-BOTTOM screen modes.
|